06 दिस॰ 2025·7 मिनट
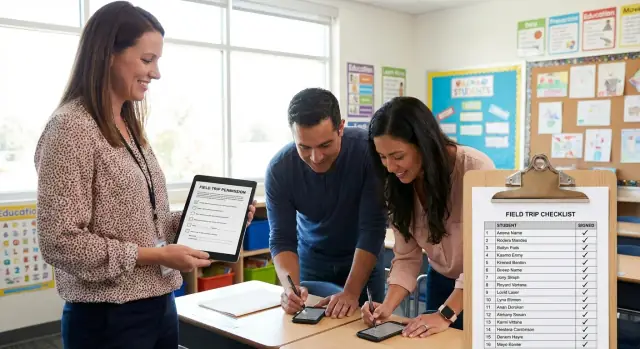
फील्ड ट्रिप अनुमति पत्र ऐप: डिजिटल हस्ताक्षर और रोस्टर
एक व्यावहारिक मार्गदर्शिका: कैसे चुनें या बनाएं फील्ड ट्रिप अनुमति पत्र ऐप — डिजिटल हस्ताक्षर इकट्ठा करें, रिटर्न ट्रैक करें, और एक साफ़ ट्रिप रोस्टर निर्यात करें।
एक व्यावहारिक मार्गदर्शिका: कैसे चुनें या बनाएं फील्ड ट्रिप अनुमति पत्र ऐप — डिजिटल हस्ताक्षर इकट्ठा करें, रिटर्न ट्रैक करें, और एक साफ़ ट्रिप रोस्टर निर्यात करें।
Paper slips fail for a simple reason: they’re easy to lose. They fall out of backpacks, get buried under homework, or sit on a counter until the night before the trip. That creates last-minute stress for families and staff, and it turns planning into a daily scavenger hunt.
Even when a slip comes back, “returned” can be vague. Does it include a parent signature, payment (if required), and the right medical details? One missing checkbox can matter as much as a missing form. Handwriting adds another problem: it’s easy to misread an allergy note or a phone number.
Paper also hides the real-time status. A teacher might have a stack of forms, the office might track payments somewhere else, and chaperones often don’t know who’s cleared to attend until departure morning. A field trip permission slip app fixes this by making the status visible to the people who need it, without passing folders around.
The same issues show up again and again: slips that are “in the backpack” but never arrive, signatures without payment, incomplete medical notes, and a final roster built in a rush.
A smooth trip day looks boring (in a good way). You already know who’s approved, who still needs a signature, who’s paid, and which notes matter. Boarding the bus becomes a quick roll call, not a scramble to call parents at 7:45 a.m.
A good field trip permission slip app does one job well: it turns a messy paper chase into a clear yes or no for every student, before a firm deadline.
Keep the structure simple: one trip, one form, one due date. If you truly need a second form (medical info, lunch choice, waiver), make it a separate step. Packing everything into one long form is where responses drop.
You don’t need dozens of settings. You need a handful of basics that work every time:
Status tracking is the real difference from email attachments. “Sent, opened, signed” (or similar) should be visible next to each student, so you’re not guessing whether a family missed the message or forgot.
Reminders should be polite and predictable. One halfway to the deadline and one 24 hours before is often enough. Too many messages lead to complaints and make parents ignore the next one.
The export should be practical: student name, emergency contact, permission status, and any key notes needed at the bus. If you still have to retype names into a separate sheet, the app isn’t saving time.
The best field trip permission slip app collects only what you actually need for trip day. Extra questions slow parents down and create messy data nobody uses.
Start with the identity details you need to match each signature to the right student. Use the same naming style your school already uses (for example, “Last name, First name”). If you have a student ID in your system, it can be safer than names alone.
Most trips can run with a small set of essentials:
Keep medical info minimal. A checkbox like “No medical concerns to share” plus a short text box for allergies is often enough. Avoid collecting detailed history. If a situation requires a plan (for example, an EpiPen), handle it through your normal school process, not inside the slip.
Pickup and dismissal questions should match reality. If students return to the same place, say so and skip pickup-location questions. If there are two options, make it a simple choice.
Optional add-ons are fine when they reduce day-of chaos. On a museum trip, you might ask “Bring lunch” vs “Order lunch.” If something isn’t confirmed, don’t ask for it yet.
A good rule: if you won’t use a field to make a decision before the bus leaves, don’t collect it.
A parent signing flow should feel like paying a bill on a phone: quick, clear, and hard to mess up. Many parents open it from a text while waiting in a pickup line, so design for small screens first. Keep the form short, use large tap targets, and avoid long paragraphs.
Start with identity. Don’t make parents guess which child the slip is for. Put the student’s name and trip details at the top, then ask for the signer’s full name and relationship (parent, guardian, other). If you need a second contact, ask for it, but don’t require it unless policy demands it.
The signature should be one clear step, not a whole page. Many schools accept either a typed name or a drawn signature. Offer both when possible and explain what counts as a valid signature in one sentence.
A clean mobile flow usually looks like this:
After submission, show a confirmation screen parents can keep. Include a simple receipt: timestamp, student name, trip name, and the signer’s name. Send a copy by email or text so it’s easy to find later.
Plan for language and accessibility. Use plain words, offer translations your community needs, and make sure the form works with screen readers. High-contrast text, readable font sizes, and labels that don’t rely on color alone prevent a lot of support calls.
A permission slip app works best when the process stays consistent from trip to trip. The goal is straightforward: everyone gets the form, parents sign once, and you have a clear yes/no list before trip day.
A workflow that avoids last-minute chaos:
Example: Ms. Rivera sends the slip on Monday with a Thursday deadline. On Wednesday afternoon, she messages only the remaining five families. Thursday morning she locks the list and prints a backup roster for the bus.
A roster is what makes trip day calm. Your app should turn every parent response into one list you can trust, not a pile of emails and screenshots.
Keep it short and focused on what staff needs in the moment:
If you collect more details in the form, don’t dump everything into the day-of roster. Put extra info into a separate “details” export that only admins can access.
Export two versions: a printable PDF for chaperones and a CSV for anyone who wants to sort or filter. The PDF should fit on one or two pages per class, with large text and clear checkboxes.
Last-minute changes happen, so the roster should show a “last updated” time. Plan for no internet: download the PDF to a phone, and print at least one master copy.
For bus check-in, add a simple “Checked in” column and stick to one method. Either mark on paper as students board, or assign one staff member to call names while another marks. After boarding, reconcile checked-in vs signed. That quick step catches issues before you leave the parking lot.
A field trip permission slip app holds more than a yes or no. It can include student names, emergency contacts, and medical notes. Treat it like student records: limit who can see it, limit what you collect, and keep a clear history of changes.
Start with simple roles and add more only when necessary:
Keep sensitive fields separate so you can hide them from chaperones by default.
If the trip doesn’t require it, don’t ask for it. Many trips can run on: student name, guardian name, signature, timestamp, and an emergency contact. Add allergy or medication info only when the destination or activity makes it necessary.
Know where data lives (your app database, school account, or a hosted service) and who can access it. Use unique logins, strong passwords, and remove access when staff change roles.
An audit trail helps when there’s confusion later. At minimum, store when it was signed, who signed, what they agreed to (the exact slip version), and any later edits (and who made them).
Field trip data shouldn’t live forever. Choose a simple rule, like archiving after the trip and deleting after a set period (for example, end of term), unless district policy requires longer.
Example: For a zoo trip, chaperones get a roster with student names, bus group, and a single emergency number. The teacher and nurse can see allergy notes. After the trip, the roster is archived, and health notes are removed first.
Most problems with digital permission slips aren’t technical. They’re small choices that make parents unsure or leave staff guessing on trip day.
If the form feels like enrollment paperwork, parents stop halfway. Keep it to what you need for this trip. If something is just “nice to know,” move it to an optional note or collect it later.
Parents often plan to “do it tonight” and then forget. Put the deadline on the first screen and in the confirmation message. Schedule one or two reminders with the same clear action: sign, submit, done.
A parent updates pickup notes or medical info, and staff prints an old roster. Allow edits, but track them. Show “last updated,” record what changed, and notify the trip lead when a key field changes (like allergies or emergency contact).
A roster that looks fine on a laptop can be useless on a bus. Before you send the slip, export a sample roster and confirm it includes the essentials: student name and class, permission status, emergency contact and phone, and only the medical notes you truly need.
One shared login makes it impossible to know who changed what. Use individual staff access with simple roles (view-only vs edit).
Before you hit send, take five minutes to catch the small mistakes that cause most of the chaos:
Do one “parent view” test with someone outside your building. Ask two questions: “Was anything confusing?” and “How long did it take to sign?” If it takes more than a minute, shorten the wording or remove optional fields.
Write down your day-of plan in one sentence, such as: “At 8:45, we check the roster, confirm emergency contacts, and mark last-minute changes.” That one line prevents a scramble at the bus.
On Monday morning, Ms. Rivera sets up a new trip: “City Museum, Friday 9:30-1:00, bus pickup 9:00, $8 fee, bring a packed lunch.” She selects her class, adds two chaperones, and sends parents the digital form.
Parents open it on their phones. They confirm pickup plans, add an emergency contact, and sign. One parent notes “Allergy: peanuts” and asks for a front seat on the bus.
By Wednesday, a handful still haven’t responded. The app sends polite reminders only to non-responders, so the rest of the class isn’t spammed. Ms. Rivera can see exactly who has signed, who has declined, and who hasn’t opened the request.
Before printing anything, she reviews notes in one place and follows up on unclear items. She checks allergies or medication notes that need a plan, support needs, payment status (if included), chaperone group assignments, and who can’t go without a signed form.
Friday morning, she exports a clean roster for the bus and the museum entry line, including emergency contacts and key flags (like allergies). Chaperones get only what they need: their group list and important notes.
After the trip, she marks it complete, archives the roster, and keeps a record of who attended. Next time, she duplicates the setup and changes the date and destination.
Choose a path: use a ready-made tool, or build something small for your specific process. Off-the-shelf is usually faster when your needs are standard (one form, one signature, one roster). A custom build makes sense when your school has specific rules, like multiple approvals, separate medical notes, or different exports per grade.
Run a small pilot first: one class, one trip, short form. You’re looking for two things: where parents get stuck and what staff still has to chase. After the pilot, change only a few things at a time (wording, required fields, reminders), then test again.
Agree on one roster format your school will keep using, even if the tool changes later. Consistency matters more than perfection.
If you decide to prototype a custom tool, Koder.ai (koder.ai) can help you turn a simple chat-style spec into a working web or mobile app and export the source code when you’re ready to own it.
Once the basics work reliably, add improvements only when they solve a real problem: payments or fee waivers, day-of check-in, support for multiple trips, staff approvals, or better reminder timing. Keep every change tied to a real pain point, and the process stays clear for parents and easier for staff.
Start with one class and one trip so you can keep the process simple. Send the digital slip through the channel families already use most, set a firm deadline a few school days before the trip, and export a roster the day before as a backup.
Look for fast trip setup, a phone-friendly signing experience, clear per-student status, reminders that only go to non-responders, and a roster export you can use immediately. If you still have to retype names or chase people manually, the tool isn’t doing the core job.
A good default is two reminders: one around halfway to the deadline and one about 24 hours before. More than that can feel like spam and trains parents to ignore messages, which makes the next trip harder.
Keep it explicit inside the form so parents know what counts. Many schools accept a typed name as a signature, but if you require a drawn signature or a specific consent statement, make that a single, clear step before submission.
Collect only what you’ll use before the bus leaves: the student identity, a reachable guardian number, an emergency contact, and a short medical notes field for urgent issues like allergies. If something needs a detailed plan, handle it through your normal school process rather than stuffing it into the slip.
Your day-of roster should include student name, permission status, emergency contact name and phone, and only the key notes staff must see on the bus. It also helps to show a “last updated” timestamp so everyone knows they’re looking at the current version.
Assume someone will have weak service at the pickup point. Download the roster to a phone ahead of time and print at least one master copy so check-in still works if the internet drops.
Use simple role-based access so people only see what they need. Teachers and office staff can manage the trip, chaperones should usually see a limited roster, and sensitive notes should be restricted with a clear change history of who edited what and when.
Set a clear cutoff time and stick to it, then decide who can approve exceptions. If edits are allowed after signing, the app should record what changed, show when it was updated, and notify the trip lead when critical fields like emergency contact or allergy notes change.
Use an off-the-shelf tool when your needs are basic and you want to move fast. Consider a custom build if you need multiple approvals, special exports, or different rules by grade; Koder.ai can help you prototype a web or mobile app from a chat-style spec, with options like source code export and ongoing iteration.