Dec 26, 2025·8 min
Handyman job photo timeline: before and after photos in one recap
Use a handyman job photo timeline to capture before and after photos, keep details organized, and share one recap page so customers feel confident.
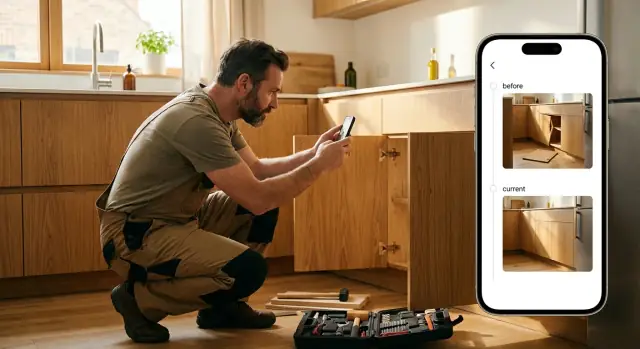
Use a handyman job photo timeline to capture before and after photos, keep details organized, and share one recap page so customers feel confident.
Customers often judge a small job with one simple question: "Did anything actually change?" If they were at work, running errands, or in another room, they only see the result, not the effort. That gap is where doubt starts, even when you did everything right.
A photo timeline closes that gap by showing the job the way you experienced it: the problem, the key steps, and the finished state. It makes the work visible. It also protects you when a customer remembers the request differently later, or when they expected a bigger improvement than the scope allowed.
Photos help most in two situations: scope and quality. On scope, a customer might say, "I thought you were fixing the whole door," when the agreed task was "replace the latch and adjust the strike plate." On quality, a clean after photo that matches the before angle can show the door sits flush now, or the caulk line is even, without asking the customer to take your word for it.
A timeline is more convincing than a folder of random images because it tells a clear story. A folder makes the customer work to understand what they're looking at. A timeline answers the natural questions in order: What was wrong? What did you do? What does it look like now?
Most small jobs only need a simple structure: a clear "before" shot of the starting condition, one or two "during" shots that prove the key step happened, and an "after" shot from the same viewpoint. If the detail matters (seal, alignment, finish), add one close-up at the end.
In a normal workflow, this fits into moments you already have: one minute on arrival, one minute before you close up a wall or cabinet, and one minute at the end before cleanup.
A good timeline is a short story with proof. It shows what you walked into, what you found, what you did, and what the customer ended up with. Keep it simple and focus on the parts a customer might question later.
If you fixed three small things, present them as three clear mini before-and-after sets. Customers don't want "everything from today" in one pile. They want to understand each task quickly.
For each task, include a clear "before" photo, a clear "after" photo, and one sentence of context. The photos show the change. The caption explains it.
Your captions should answer two questions: what changed, and why it mattered. For example:
If there's something the customer picked (or something you don't want to be blamed for later), add a short note under the set: the material used, a quick measurement, the color name, or a model number. It helps when they call months later and ask, "What did you put in there?"
Optional details are useful when they truly apply: paint color and sheen, caulk type, filter size, hinge size, anchor type, part numbers, and quick measurements like "gap reduced from 6 mm to 1 mm." Keep it factual, not promotional.
Put the photos in the same order the job happened. It reads as honest progress and makes the recap easier to follow.
A practical flow is: an arrival wide shot of the area, a close-up of the problem, one work-in-progress photo if it helps explain, the clean after photo, then a quick final wide shot that shows the area looks normal again.
If you need to show something "not visible," add one proof shot instead of a long explanation. A new shutoff valve under a sink, a replaced part next to the old one, or an open wall showing the damaged section is usually enough.
Don't overdo it. Most small jobs only need 6 to 12 photos total. The goal is clarity: enough detail to remove doubt, not so much that the customer stops reading.
A photo recap only builds trust if the customer feels respected. Before you take or share anything, get clear permission and set expectations. A simple sentence like, "I'll take a few before and after shots for your records, is that OK?" is usually enough.
Ask before you start, especially inside a home. If the customer isn't present, confirm in writing ahead of time what you'll photograph, for example "under-sink cabinet only" or "back patio gate repair." If they say no, respect it and skip photos rather than taking a quick shot anyway.
A short checklist prevents most problems: ask permission before indoor photos, explain the purpose (documentation, warranty, a clear recap), confirm what's included and what's off-limits, offer to retake if something private appears, and be clear about who will see the recap (typically only the customer unless they approve otherwise).
Most privacy issues are accidental: a family photo on a shelf, mail on a counter, a computer screen in the background. Before you tap the shutter, scan the frame and move the camera closer to the work area.
Try to keep names and addresses off packages, family photos (especially of children), screens (phones, laptops, smart displays), license plates, and paperwork or medicine labels out of the shot.
Many phones automatically add location data to photos. If a customer is sensitive about privacy, turn off location tags for the camera or remove location info before sharing.
Store photos like you store invoices: securely, and only as long as you need. Limit access to the smallest number of people possible (often just you), and avoid forwarding photos in group chats where they can spread.
Example: You fix a leak under a kitchen sink. Before the "before" photo, you ask permission, remove a pile of mail from the cabinet, and frame the shot tightly on the shutoff valve and supply line. The customer gets proof of what was changed, without personal details ending up in the recap.
The most convincing timelines aren't about fancy camera work. They're about consistency. If the after photo is taken from a different corner of the room, a different height, or different lighting, customers struggle to compare, even if the work is excellent.
Lock in your "before" position. Stand in one spot, aim at the same point, and keep a similar distance. A simple trick is to line up with a fixed reference like the edge of a door frame, a tile grout line, or the corner of a cabinet. When you come back for the after shot, use that same reference so the photos match naturally.
A strong set usually includes one wide shot for context and one close-up for proof. The wide shot answers "Where is this?" The close-up answers "What changed?" On a drywall patch, for example, take a wide shot of the wall section, then a close-up of the repaired area showing texture and paint blend.
A marker can make the result feel measurable, especially for alignment or size. Use them only when they clarify the story.
A tape measure next to a gap, a small level showing a shelf is straight, or a sticky note label like "Leak was here" near a joint (removed after) can help. Your hand can work for scale too, when appropriate.
Try to shoot with the same light source both times. Daylight before and warm bulbs after can make surfaces look like different colors. If you need flash, point the camera slightly off-angle to reduce glare on glossy paint, chrome, or tile.
Example: If you replaced a bathroom faucet, take the before wide shot from the doorway, then a close-up of the handles and supply lines. Repeat the same two shots after installation, with the same lights on both times. The customer can compare in seconds and feel confident the job was done right.
A good recap is one place where the customer can see what you found, what you did, and what it looks like now. Keep it consistent from job to job so it takes minutes, not hours.
Start the timeline before you pick up a tool. Create a new job entry with the customer name (or initials), the date, and whatever identifier you use for your records. This gives every photo a clear home and makes it easier to find proof later.
On arrival, take your before set right away. A practical target is three angles: a wide shot for context, a medium shot of the problem area, and a close-up of the detail.
Add progress photos only when they matter. The most convincing ones are often the parts customers never see: plumbing under a sink, wiring behind a plate, rotted framing after you open it up, or the old part next to the replacement. One clear shot beats five messy ones.
Before you pack up, take your after set from the same angles as the before set. Then add one extra photo that shows cleanup: the area wiped down, debris removed, or a final wide shot that makes the space look normal again.
Finish with two or three short notes:
Example for a leaking kitchen P-trap: "Found a cracked slip nut and misaligned washer. Replaced nut/washer, reseated the joint, and tested for 10 minutes with full flow. Re-check tonight after hot water use."
A photo timeline works when the customer can quickly answer two questions: "Where is this?" and "What changed?" Most timelines fall apart when the photos are hard to place, out of order, or feel selective.
Mixing photos from different rooms or tasks without labels is a common issue. If you patch drywall in a hallway and replace a faucet in the kitchen, those images shouldn't alternate with no context. The customer shouldn't have to guess whether they're looking at the same spot.
Only taking close-ups is another trust killer. A tight shot of a crack, stain, or loose fitting can be useful, but it needs at least one wider orientation photo. Without it, the customer can't tell location, scale, or whether the after photo matches the before.
Privacy mistakes can also backfire. Photos that show mail on a counter, family photos on the wall, license plates in a driveway, or a house number by the door can make customers uneasy. Even if the customer is the only person who sees it, it signals carelessness.
Over-editing is a quieter problem. Heavy filters and boosted contrast can make surfaces look cleaner or damage look worse than it was. That can feel misleading, even when your work is solid.
Finally, waiting until the end often means you forget key before shots. Then you try to recreate them and the angles don't match. The result looks like two unrelated photos.
Use one repeatable pattern:
Do this every time and the recap feels obvious and honest, which is what builds trust.
A good timeline isn't just a nice extra. It's proof you can point to when money, scope, or expectations get fuzzy. When the customer sees a clear story from start to finish, it's easier for them to say, "Yes, that's what I approved," and move on to payment.
The biggest win is clarity. Instead of a long text chain, a few loose photos, and a phone call, the customer gets one clean recap. That single view makes it harder for details to get lost, and it reduces the "Wait, what did you do again?" follow-ups that slow down invoicing.
Disputes usually happen in the gaps: what was included, what wasn't, and why something cost more than expected. Before-and-after photos help close those gaps because they show the condition you walked into and the result you delivered.
A timeline also helps you:
It can speed up approvals for extra work too. "Here's the cracked valve behind the cabinet" is easier to accept than a long explanation.
And when the proof is ready, invoicing is faster. You can send the recap and the invoice at the same time, while the job is fresh in their mind. Customers are also more likely to leave a good review when they can clearly see the improvement and remember how smooth the process felt.
Start with one short sentence that matches the customer's request in their words. It keeps the recap grounded and avoids the "what did I pay for?" feeling. Example: "You asked me to stop the kitchen sink leak and secure the loose supply line."
Keep the recap small and ordered. Customers don't want a photo dump. Pick the few images that tell the story: the problem, one key work-in-progress shot if it adds clarity, and the finished result. If a detail matters (a crack, a stain, a broken bracket), include a close-up plus one wide shot for context.
Treat captions like labels, not a diary. Use simple words and say what changed between photos. If you used parts, name them in everyday terms.
Good caption examples:
Avoid vague captions like "Fixed" or "All good." They don't help the customer remember what happened.
Finish with a short final note that answers: what's done, what to watch for, and whether there's a follow-up date. This reduces repeat questions and makes approvals easier.
A simple structure that works well is: request (1 sentence), before (1-2 photos), work (1 photo, optional), after (1-2 photos), final note (2-3 sentences).
A customer says, "The kitchen faucet keeps dripping, and the cabinet floor looks swollen." You plan to send a simple timeline afterward so they can see what changed, step by step.
Before you touch anything, take two wide shots and a few close-ups. One shows the faucet base and the drip point. Another shows the cabinet bottom with the damp, warped area. A close-up of the shutoff valves helps too, especially if one is stiff or corroded.
During the job, capture proof that the fix was real, not just cosmetic. Good "during" photos are the ones that answer questions later: the faucet disconnected and old supply lines removed, the new supply lines installed and tightened at both ends, fresh sealant applied where the faucet meets the sink, and the old parts set aside.
After the install, take a short "no drip" sequence. One photo shows the sink area clean and dry. Another shows a paper towel under the connections after water has run for a minute. A final wide shot shows the cabinet base cleared out.
Your recap text can be short and still feel professional:
"Arrived 10:10, finished 11:35 (1 hr 25 min). Found drip from worn supply line and old seal under faucet base. Replaced both hot/cold supply lines, resealed faucet base, ran water test, and checked cabinet connections with dry towel test. Dried cabinet base and removed old parts."
Include a simple parts list (brand is optional): "2x braided supply lines, plumber's putty or silicone, cleaning wipes." Then add one care tip: "Re-check the cabinet for any moisture tonight and tomorrow morning. If you see a drop, text me a photo right away so I can take care of it quickly."
A photo timeline only works if you can do it quickly on every job, even small ones. The goal is a simple habit: take the same kinds of photos, add short captions, then send one clean recap.
Before you share, do a 30-second check: scan for private info (faces, license plates, mail, family photos, alarm panels, medication labels), confirm the order reads cleanly (before, during, after), and make sure the after photos match the before angle.
Next, make a reusable template for your most common jobs. Keep it short so you'll actually use it. For a faucet replacement, for example: "Before: leak under sink," "During: valves inspected," "After: no drip, test run 2 minutes." The same idea works for drywall patches, outlet swaps, fence fixes, and door adjustments. When you reuse the same labels, customers learn what to look for and your work looks more consistent.
Decide where these timelines live, then stick to it. Some handymen keep them per job so each recap is easy to find later. Others also group by customer so repeat clients have a history (useful for rentals, property managers, or a homeowner doing a long list over a few months). Pick one default and only do both when the relationship is ongoing.
If you ever want to turn this into a simple, repeatable recap page you can generate fast, a chat-based builder can help. For example, Koder.ai (koder.ai) lets you describe a photo-timeline workflow in plain language and produce a shareable recap page layout you can reuse, without spending your evening formatting updates.
A timeline makes the work visible. Instead of asking the customer to trust a summary, you show the starting problem, one or two key steps, and the finished result so they can quickly see what changed.
For most small jobs, use a simple set: a clear before photo, one during photo that proves the key step happened, and an after photo from the same angle. Add one close-up at the end only if a detail like alignment, seal, or finish is what the customer will judge.
Take the after photo from the same spot, height, and distance as the before photo. Use a fixed reference like a door frame edge or tile line so the customer can compare instantly without guessing.
Include one wide shot for location and one close-up for proof. A close-up alone can feel untrustworthy because the customer can’t tell where it is or whether the after shot is the same place.
Keep captions short and factual: what was wrong, what you changed, and why it matters. One clear sentence per task is usually enough, and it prevents “I thought you fixed the whole thing” misunderstandings later.
Ask before you start and be specific about what you’ll photograph and who will see it. If they say no, don’t take photos; a timeline only builds trust when the customer feels respected.
Frame tightly on the work area and scan the background before you shoot. Avoid mail, family photos, screens, medication labels, addresses, and anything that could identify the customer or their home.
Turn off location tags if privacy is a concern, and store photos like invoices: securely and only as long as you need. Keep access limited, and avoid forwarding photos into group chats where they can spread.
Don’t mix rooms or tasks without labels, don’t upload photos out of order, and don’t rely on heavy filters. Also don’t wait until the end to start shooting, because you’ll miss the real “before” and the set won’t match.
Send the recap and invoice together while the job is fresh, and keep the recap in one clean place instead of scattered texts. If you want this to be repeatable, you can build a simple recap page template with a chat-based tool like Koder.ai and reuse the same structure on every job.